Welcome to Verve's March Diva Inspirations Challenge Hop!
We're bringing back our monthly inspiration challenge and would love
for you to play along! On the 10th of each month we'll bring you a blog
hop, sharing our takes on the challenge. After that, we'd love for you
to try your hand at the challenge and link up on the
Verve Blog for a chance to win.
PRIZE ALERT: Our challenge comes with a prize drawing for a $30 gift voucher to the
Verve shop.
To be eligible, be sure to hop around and leave a comment on each of
the Diva blog posts, then play along and link up before April 5. Verve
stamps are NOT required, but we do love to see 'em!

There are no rules.. just have fun creating!
This month we'd love for us to show us your green. Feel free to take
inspiration from this drippy, weathered gate photo or just pull out some
green toys from your stash and start to play. We can't wait to see
what you create!
If you have come here from
Laurie's blog you are right on track. If not, check out the Hop List below and get caught up!
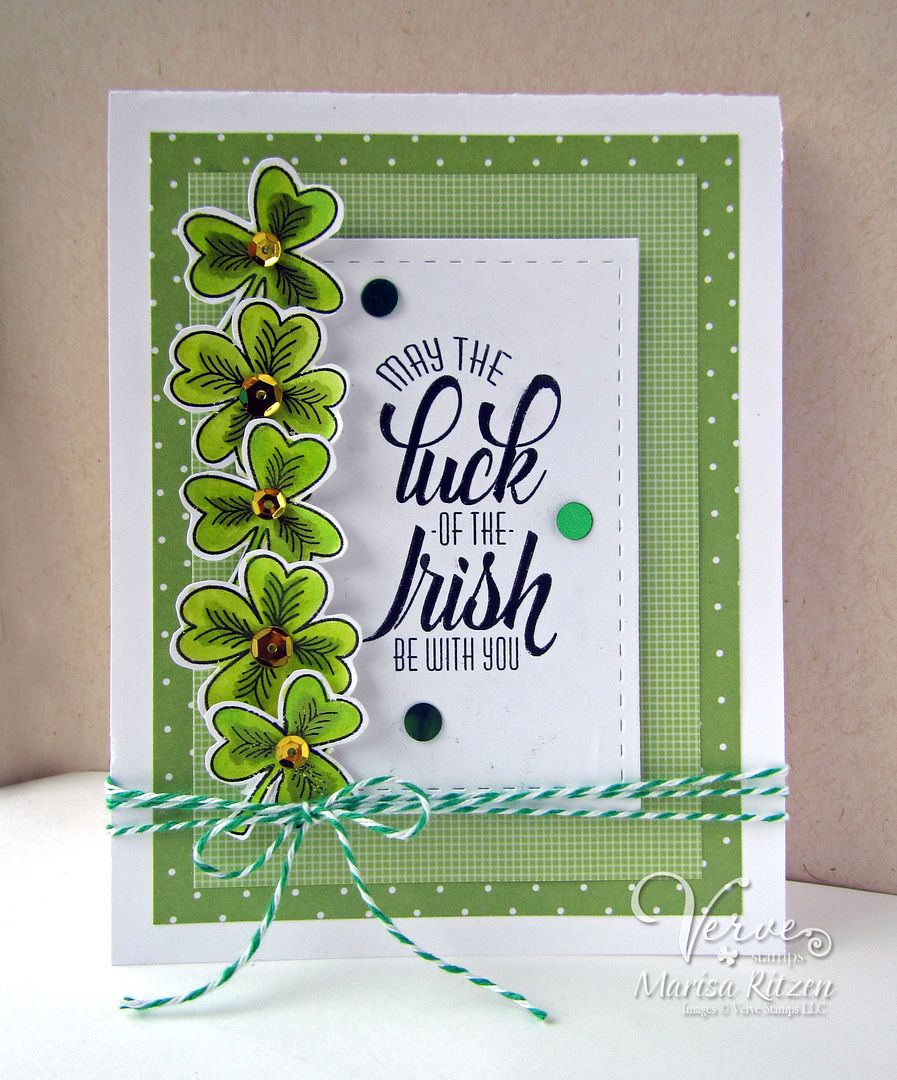
I was almost giddy when I read the challenge was to use green as it is my favorite colour ♥ Being March, it is a perfect opportunity to combine green with Verve's newest digi
Irish Coffee,
just in time for St. Patrick's Day! I have several Irish friends, so I
always love the fact I create a special, hand made card for them.
I combined two green papers (happy sigh....), coloured and fussy cut the cloverleaf digis so I could create a "clover patch" down the side of the sentiment panel. Of course, gold came to mind too, so I added a gold sequin to the middle of each shamrocks to bring a bit of sparkle to the card and finished things off with some green twine. Can't wait to deliver this to my Irish friend on St. Patrick's Day :)
Need a little inspiration? Check out the blogs linked below to see what the other Divas did with the challenge!
It's sure to be a treat, and speaking of treats, we're giving away a $30 gift voucher to Verve. Just leave a little love as you hop about, then come back and link up your green creations for a chance to win!
Time to head on over to our Irish Diva Maureen's blog to see her wonderful creation which is sure to toast her heritage :) Thanks for popping by today and I look forward to seeing your creations in the gallery!
What's In It?
Stamps: Irish Coffee Digi Set (Verve Stamps)
Paper: Recollections (Michael's)
Ink: Black
Accessories: Stitched Rectangles (Lil Inker), Twinkling H2Os, Twine, Glue Dots, Gold and Green Sequins, Dimensionals


 *
*


